Every dancer knows that perfectly fitted pointe shoes are an essential part of their journey to exquisite dance performances. But did you know the art of sewing your pointe shoes can be a game-changer in enhancing comfort, support, and confidence?
In this blog post, we’ll walk you step-by-step through the process of sewing ribbons and elastics onto your pointe shoes with ease.
You Are Watching: How To Sew Pointe Shoes Updated 10/2024
Say goodbye to ill-fitting ballet slippers and hello to beautifully customized dance footwear tailored just for you.
What You’ll Need
To sew pointe shoes, you’ll need a few essential materials such as pointe shoes, ribbons, elastics, a sewing needle, thread or dental floss for added durability, scissors and measuring tape.
Pointe Shoes
Pointe shoes are an essential part of a dancer’s life, providing them with the necessary support and structure to perform those breathtaking ballet steps.
These uniquely designed shoes enable dancers to stand on their toes and execute intricate choreography with grace and poise.
For any aspiring ballerina, investing in high-quality pointe shoes can make all the difference for both training and performance. However, finding the perfect pair that fits your feet like a glove is only half the battle – knowing how to sew on ribbons and elastics ensures optimal support during dance class or performances.
For instance, renowned Russian prima ballerina Anna Pavlova customized her pointe shoes by sewing darning into the sole’s tips for added durability since she had particularly narrow feet.
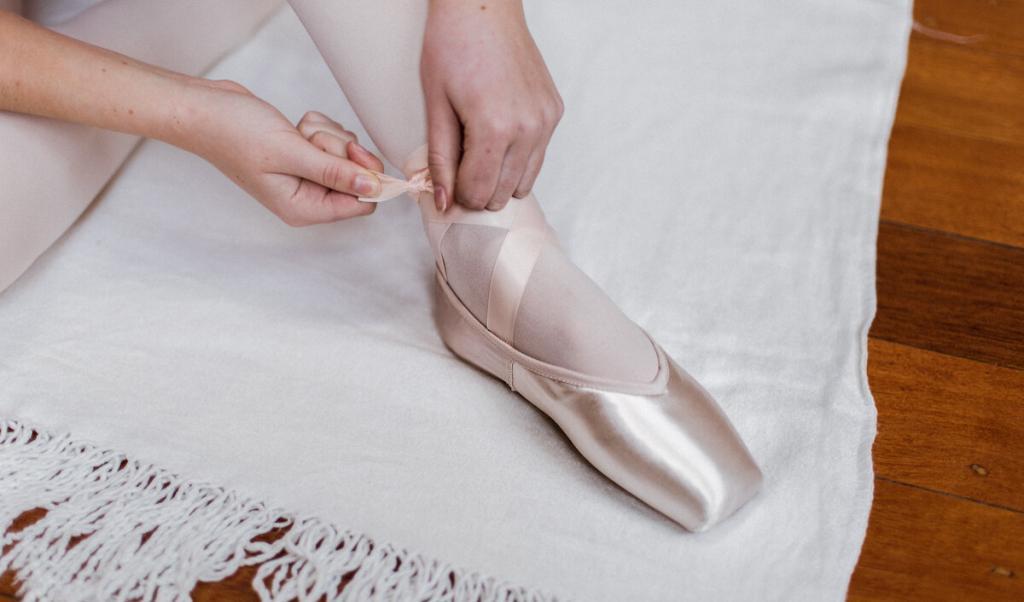
Ribbons
Ribbons play a crucial role in securing pointe shoes comfortably and safely to a dancer’s feet. As an essential part of a dancer’s life, these ribbons come in various materials such as synthetic and cotton, with stretch pointe shoe ribbons growing increasingly popular for their flexibility and support.
Sewing on your pointe shoe ribbons requires precision in placement to ensure optimal ankle support for every performance or dance class. A common approach is marking the cotton lining where you want to attach them while bending the heel forward towards the front of the shoe.
Sewing through only the inner lining rather than satin will enhance durability without compromising aesthetics.
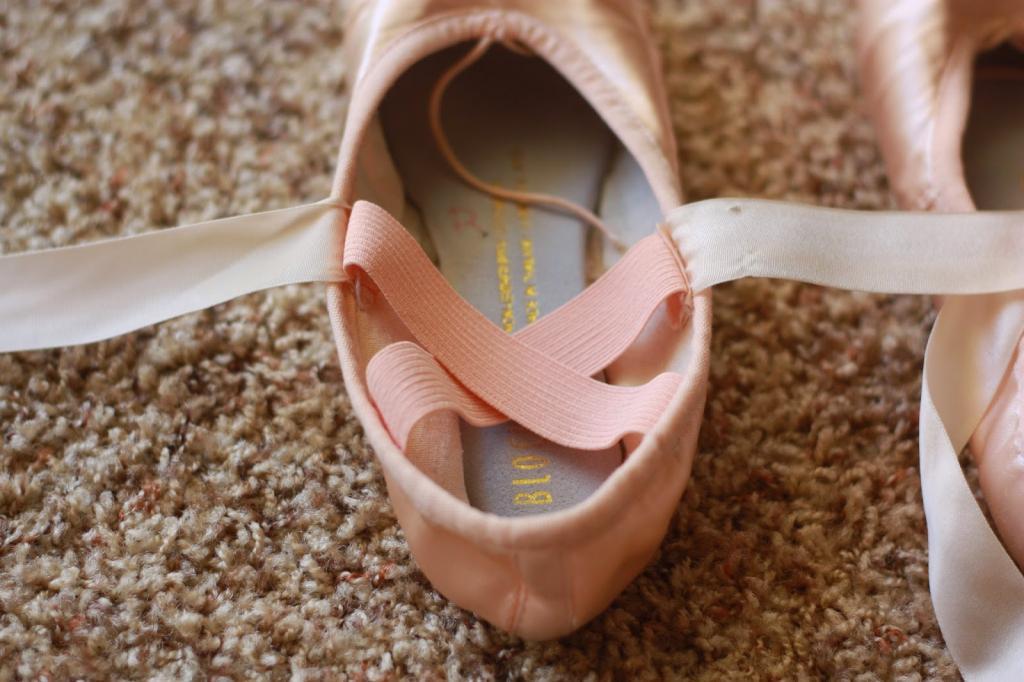
Elastics
Elastics are crucial components of pointe shoes, providing dancers with the necessary support and stability during their performances.
To determine the appropriate length and placement of elastics for optimal comfort and support, it is essential for dancers to consider factors like their unique ankle shape and arch height.
Additionally, selecting high-quality materials like shirbrand elastic or ballet-specific stretch material can ensure that your pointe shoes remain snugly secure throughout long dance classes and rehearsals.
Sewing Needle
To sew on ribbons and elastics, you’ll need a strong needle that can pierce through the pointe shoe material. A sharp, sturdy needle is recommended to prevent hand cramps and ensure accuracy in stitches.
Some dancers prefer using thimbles to protect their fingers from being pricked by the needle while pushing it through thick layers of ribbon and elastic.
Additionally, it’s a good idea for dancers to keep a few extra needles in their dance bag for unexpected repairs during class or performances. When choosing thread for your sewing project, opt for either pink or white cotton thread as this will blend seamlessly with your pointe shoes.
Alternatively, synthetic threads can also be used if preferred.
Thread Or Dental Floss
When it comes to sewing ribbons and elastics onto pointe shoes, the choice of thread can make a big difference in the durability and strength of the final product.
While regular cotton or synthetic threads can work, dental floss is often recommended by experienced dancers and seamstresses for its added strength and resistance to knotting.
The coated texture of dental floss helps prevent it from getting caught or tangled during sewing, making it easier to work with than traditional threads. Additionally, using dental floss can help extend the lifespan of pointe shoes by reducing wear and tear over time.
Scissors
To sew pointe shoes, you will need a good pair of scissors. You want to use sharp, precise scissors that can easily cut through the ribbon and elastic without fraying the edges.
Dull or cheaply made scissors can cause uneven cuts and make it difficult to work with delicate materials. When cutting your ribbon and elastic, be sure to measure carefully with a ruler or measuring tape before making any cuts.
This will ensure that your ribbons and elastics are evenly sized and placed on both shoes for proper support while dancing.
Measuring Tape
Before you start sewing on the ribbons and elastics, it’s important to measure for the perfect fit. For this step, you’ll need a measuring tape.
First, measure around the widest part of your foot to determine your size. Then, use the measuring tape to find the correct placement for both your ribbons and elastics.
Additionally, keep in mind that every dancer’s feet are unique and may require different placements for optimal support and comfort. Taking accurate measurements with a measuring tape can make all the difference when applying these critical elements to your pointe shoes.
Sewing On The Elastics
To begin sewing on the elastics, measure the length needed and determine their placement by having the dancer stand in their shoes with ankles crossed to find where they need extra support.
Determine The Length And Placement
Before beginning to sew on the elastics and ribbons, it’s essential to determine the right length and placement for your pointe shoes. The length will depend on your ankle size, the height of the heel of your shoe, and personal preference.
To measure correctly, wrap a measuring tape around your ankle at its narrowest point just above the bone and add one inch to this measurement. This length will be used for both ribbons and elastic.
Next is determining where to attach them. For elastic placement, most dancers prefer criss-crossing elastics over their ankles, which helps secure the foot in place while still allowing flexibility in movement.
Another option is looping elastics around your ankles once or twice for a snugger fit but less flexibility depending on what feels comfortable for you as a dancer.
Finish The Ends
To ensure that the ribbons and elastics attached to your pointe shoes stay secure, it’s important to finish the ends properly. This helps prevent fraying over time and ensures that the attachments remain strong.
One way to do this is by using a lighter or nail polish to seal the edges of the ribbon or elastic after cutting them. Simply hold the end near a flame for a few seconds until it melts slightly, then press it between your fingers to smooth out any rough spots.
It’s essential that these finishes be done carefully since they help keep everything together during dance routines. You don’t want those ends coming apart while you’re in class! Moreover, make sure you follow through each step in securing your pointe shoe ribbons such as attaching them at appropriate height for proper ankle support according to Dance Essentials Inc.
Attach The Elastics
Attaching the elastics is an essential step in sewing pointe shoes. It ensures a snug and secure fit for the dancer, preventing any slips or blisters during performances.
To begin, measure and cut two pieces of elastic that are slightly shorter than the length from your ankle bone to the arch of your foot. Use a running stitch to sew one edge of each elastic to the corresponding side of the shoe heel, securely anchoring it in place.
Read More : Cross Training Vs Running Shoes Updated 10/2024
To finish, use a knot or fray check on both ends of each elastic to prevent any fraying over time. For added durability, dental floss can be used instead of regular thread when attaching elastics as it’s stronger and less likely to snap during vigorous movement.
Remember always to keep a spare needle, thread, scissors and elastics in your dance bag for emergency repairs.
Sewing On The Ribbons
To sew on the ribbons, use a pencil to mark where they should be placed on the inside of the shoe, and attach them securely with small stitches using cotton thread or dental floss.
Determine The Placement
Before you start sewing on the ribbons, it’s essential to determine their placement correctly. It’s recommended to have your dance teacher or a professional fitter check the positioning of your ribbons before you sew them on.
However, if that isn’t possible, follow these simple steps. Place your shoes on and stand in parallel position with equal weight distribution on both feet. Next, use a pencil to mark where you want the ribbon to sit at the back of each heel and where it should cross over at the ankle bone.
Proper placement of ribbons is crucial for preventing injuries such as strained Achilles tendons and unstable ankles during pointe work. Not only does it provide extra support for dancers lifting onto pointe, but it also keeps the shoe securely in place throughout all ballet movements.
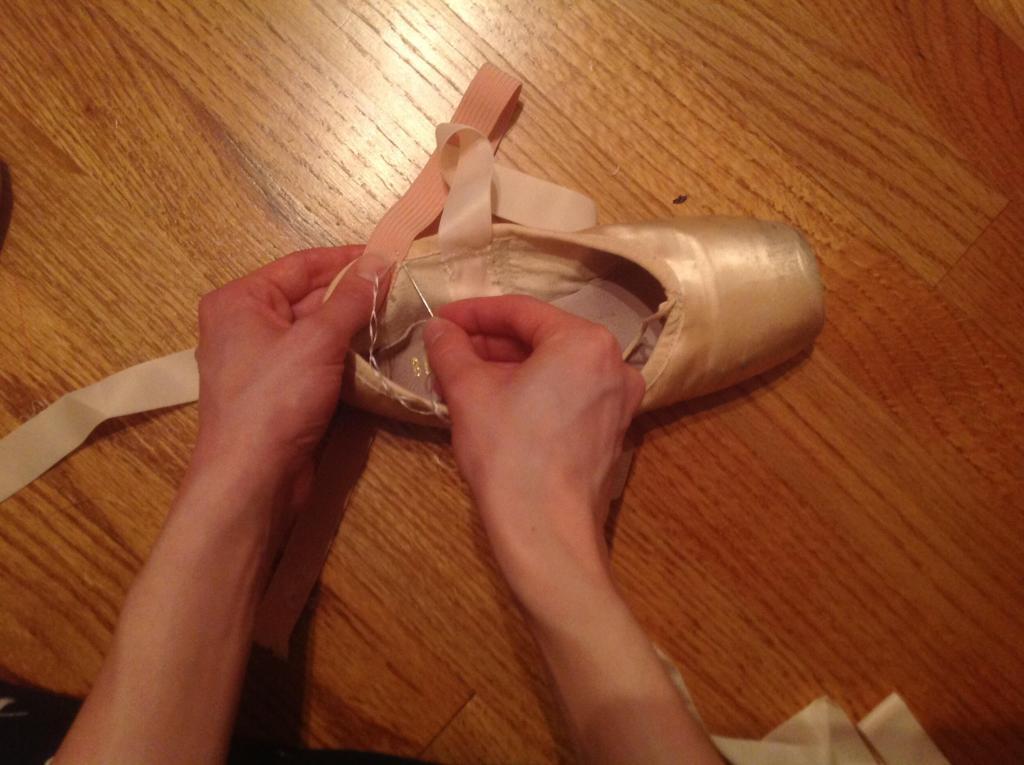
Attach The Ribbons
Attaching ribbons to pointe shoes is an essential part of the process. It provides added support and helps keep the shoes secure while dancing. To attach the ribbons, determine where you want them placed on your shoes.
Fold one end of each ribbon over and use a pencil or safety pin to mark its placement on both sides of each shoe. Next, sew the ribbon onto the inside of your shoe using a running stitch with cotton/thread that matches your ribbon color.
Make sure you pull it tight enough so it doesn’t sag but not too tight that it’s uncomfortable when tied around your ankle.
It’s important to note that proper attachment of ribbons is crucial for preventing dancer injuries such as twisted ankles or sprains, so take care when following these steps for attachment.
Extra Tips For Sewing Pointe Shoes
To ensure your pointe shoes have maximum durability and support, you may want to consider sewing on the inside of the shoe or using dental floss instead of traditional thread.
Sewing On The Inside Or Outside Of The Shoe
When it comes to sewing on ribbons and elastics, there are different preferences for whether they should be attached on the inside or outside of the pointe shoe.
Some dancers prefer to sew them on the inside for a more seamless look, while others opt for the outside to make adjustments easier. For performances or exams, most studios recommend attaching them on the inside so that they don’t distract from the dancer’s lines and movements.
Regardless of where you decide to sew your ribbons and elastics, it’s important to ensure that they’re comfortable and secure. The elastic should fit snugly around your heel or ankle without causing any pain or discomfort, while the ribbons should support your arch at its highest point.
Using Dental Floss For Added Durability
To ensure your pointe shoes last longer, you can use dental floss to add extra strength to the stitches. Simply use it instead of thread when sewing on your ribbons and elastics.
Dental floss is made from nylon or other synthetic materials that are stronger than regular cotton thread, so it can withstand the stress put on pointe shoe stitches by intense dance movements.
In addition to being more durable, dental floss also resists moisture and sweat better than regular thread, which means it won’t weaken or break as easily with repeated use.
Just be sure to match the color of the dental floss with your ribbon and elastic colors.
Conclusion
Sewing on ribbons and elastics to pointe shoes can be intimidating, but with the right materials and technique, it’s a simple task for any dancer. Remember to sew the ribbons onto the inner cotton lining of the shoe and add elastic for added support.
Sources: https://www.centuryinshoes.com
Category: Shoes